
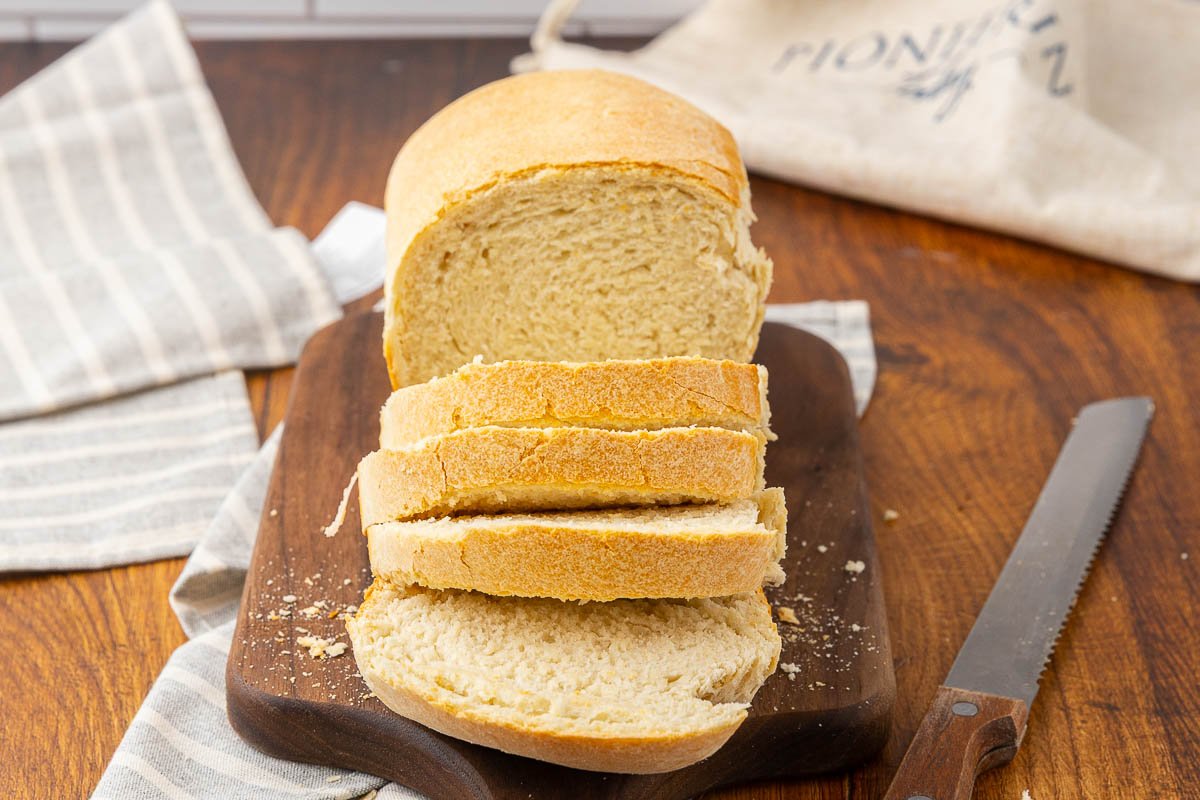
Making soft, fluffy bread at home is much easier once you understand what the dough should look and feel like at each stage. This beginner-friendly recipe uses everyday ingredients and a simple loaf-pan method.
The most important parts are not complicated: measure the flour accurately, avoid adding too much extra flour, knead the dough until it becomes elastic, and let it rise based on how the dough looks rather than relying only on the clock. Similar sandwich-bread formulas use flour, milk or water, fat, sugar, salt, and yeast, with a first rise followed by shaping and a second rise.
The result is a tender loaf with a soft crumb and lightly browned crust that works well for toast, sandwiches, or simply serving warm with butter.
Why You’ll Like This Recipe
- Beginner-friendly: You do not need a bread machine or special baking equipment.
- Soft texture: Milk, butter, and a properly hydrated dough help create a tender crumb.
- Clear visual cues: You will know when the dough is kneaded and proofed enough.
- Easy to adapt: The recipe can be made with all-purpose flour, or partly with whole-wheat flour.
- Freezer-friendly: Extra slices can be frozen so the whole loaf does not need to be eaten quickly.
Ingredients
Makes 1 standard loaf
- 3 cups (360 g) all-purpose flour
- 1 cup (240 ml) lukewarm milk
- 2 tablespoons (28 g) unsalted butter, softened or melted and cooled
- 2 tablespoons (25 g) granulated sugar
- 1 3/4 teaspoons instant yeast
- 1 1/4 teaspoons (7–8 g) salt
Why these ingredients matter
Flour: Provides the gluten structure that allows the bread to rise and hold its shape.
Milk: Gives the loaf a softer, more tender crumb than a basic flour-and-water dough.
Butter: Adds richness and tenderness.
Sugar: Provides a small amount of sweetness and supports browning.
Yeast: Produces the gas that makes the dough expand.
Salt: Adds flavor and helps control the dough’s fermentation.
For the most consistent results, weighing the flour is preferable. If using cups, spoon the flour lightly into the measuring cup and level the top rather than packing it down.
Equipment
You only need:
- Large mixing bowl
- Measuring cups and spoons or kitchen scale
- Wooden spoon or sturdy spatula
- 8 1/2 x 4 1/2-inch or 9 x 5-inch loaf pan
- Clean work surface
- Cooling rack
- Instant-read thermometer, optional but very useful
How to Make Soft, Fluffy Bread at Home
1. Prepare the milk
Warm the milk until it is lukewarm, not hot. Mix it with the butter and sugar.
If using instant yeast, you can add it directly with the flour. If using active dry yeast, dissolve it in the lukewarm milk with the sugar first and let it stand for about 5–10 minutes. A little foaming indicates that the yeast is active.
The liquid should feel comfortably warm rather than hot. Excessive heat can damage yeast.
[Photo: Show the lukewarm milk mixture in a bowl with the butter beginning to melt, alongside the measured flour, yeast, salt, and sugar.]
2. Mix the dough
Add most of the flour, the yeast, and the salt to the bowl.
Stir until the flour is absorbed and a rough dough forms.
Do not immediately add extra flour if the dough feels sticky. Flour absorbs liquid gradually, and adding too much can produce a heavy loaf.
At this point, the dough should look rough and somewhat sticky.
3. Knead until smooth and elastic
Turn the dough onto a lightly floured surface and knead for about 7–10 minutes by hand.
Push the dough away with the heel of your hand, fold it back toward you, turn it slightly, and repeat.
At first it may feel sticky. As gluten develops, it should become smoother, more elastic, and easier to handle.
You are looking for dough that feels soft and springy rather than stiff.
A useful check is the windowpane test. Stretch a small piece of dough gently between your fingers. If it can stretch thin enough for some light to pass through before tearing, the gluten has developed well.
[Photo: Show a small piece of kneaded dough stretched between both hands, thin enough to partially see light through without immediately tearing.]
4. Let the dough rise
Lightly grease the mixing bowl and place the dough inside. Turn it once so the surface is lightly coated.
Cover the bowl and leave it in a reasonably warm, draft-free place.
Allow it to rise for approximately 1–2 hours, but watch the dough rather than following the clock exactly.
The dough should become noticeably puffy and close to doubled in size. A cool kitchen can make this take longer.
[Photo: Show the dough before and after the first rise, with the risen dough visibly larger and puffy.]
5. Shape the loaf
Gently press the dough to remove some of the large air pockets.
Place it on a lightly floured surface and shape it into a smooth log roughly the length of your loaf pan.
Try to keep the surface reasonably tight without tearing the dough.
Place the shaped dough seam-side down in a lightly greased loaf pan.
6. Let it rise again
Cover the pan loosely and leave the dough to rise again for about 45–75 minutes.
The exact time depends heavily on room temperature.
The dough should become visibly puffy and rise above the edge of the pan by roughly 1 inch.
You can also gently press a floured fingertip into the dough. If the indentation slowly springs back, the dough is generally ready to bake. If it immediately fills in, give it more time.
[Photo: Show the shaped dough in the loaf pan after the second rise, with the dough rounded and sitting about 1 inch above the pan rim.]
7. Bake
Near the end of the second rise, heat the oven to 350°F (175°C).
Place the loaf on the middle rack and bake for approximately 30–35 minutes.
The crust should be light golden brown.
For a more reliable check, insert an instant-read thermometer into the center of the loaf. A temperature around 190°F (88°C) is a useful target for this style of sandwich bread.
If the top becomes dark before the center is finished, loosely cover it with foil for the remaining baking time.
[Photo: Show the finished loaf immediately after baking, with an evenly golden top and firm sides.]
8. Cool before slicing
Remove the loaf from the pan and place it on a cooling rack.
Wait until it has cooled substantially before slicing.
Cutting very hot bread can compress the soft interior and make the slices appear gummy.
Important Tips for Better Results
Measure flour carefully
Too much flour is one of the easiest ways to make homemade bread dense.
A kitchen scale gives the most consistent result. If measuring by volume, spoon flour into the cup and level it rather than scooping directly from a packed container.
Don’t keep adding flour
The dough should be soft and slightly tacky, not dry.
If you add flour every time the dough sticks to your hands, you can quickly change the flour-to-liquid ratio.
Instead, knead for several minutes first. The dough often becomes easier to handle as gluten develops.
Watch the dough, not just the timer
Proofing time changes with room temperature, yeast activity, and the dough itself.
A dough that has become noticeably puffy is more useful information than a timer that says exactly 60 minutes.
Don’t rush the second rise
Under-proofed bread can have a dense interior and may split unpredictably in the oven.
On the other hand, severely over-proofed dough can lose strength and collapse.
Give the bread time to cool
The interior continues to settle after baking. Cooling on a rack also prevents condensation from making the crust unnecessarily damp.
Common Mistakes
Problem: The bread is dense and heavy
Why it happens: Too much flour, insufficient kneading, inactive yeast, or inadequate rising can all contribute.
How to fix it: Check the flour measurement, make sure the yeast is active, knead until the dough becomes elastic, and allow enough time for the dough to become puffy.
Problem: The dough barely rises
Why it happens: The yeast may be old, the room may be cold, or the liquid may have been too hot.
How to fix it: Give the dough more time in a comfortably warm location. If using active dry yeast, test the yeast in lukewarm liquid before making another batch.
Problem: The bread tastes floury or feels dry
Why it happens: Too much flour was incorporated during mixing or kneading.
How to fix it: Start with the measured quantity and resist correcting stickiness with large amounts of additional flour.
Problem: The loaf rises beautifully and then collapses
Why it happens: The dough may have been allowed to proof too far or was not strong enough to support its expanded structure.
How to fix it: Bake when the second rise reaches the appropriate stage instead of waiting for the dough to become extremely large.
Problem: The crust gets dark before the bread is finished
Why it happens: Ovens vary, and the top of the loaf can brown faster than the center cooks.
How to fix it: Loosely tent the loaf with foil and continue baking until the center reaches the appropriate temperature.
Ingredient Substitutions
Bread flour instead of all-purpose flour
Bread flour can be used, but the dough may feel somewhat different because of its higher protein content.
Effect: Potentially chewier structure and slightly different dough handling.
Whole-wheat flour
For a beginner-friendly adjustment, replace up to half of the all-purpose flour with whole-wheat flour.
You may need a little additional liquid because whole-wheat flour absorbs more water. Similar sandwich-bread formulas use this partial substitution rather than replacing all the white flour at once.
Effect: More pronounced wheat flavor, darker color, and a somewhat denser crumb.
Plant-based milk
Unsweetened, unflavored plant milk can be used in place of dairy milk.
Effect: The flavor will vary depending on the milk, while the texture should remain reasonably close.
Oil instead of butter
Use a neutral cooking oil in roughly the same amount.
Effect: The bread will still be soft, but it will have less buttery flavor.
Recipe Variations
Honey bread
Replace the granulated sugar with honey.
The loaf will have a slightly different flavor and may brown a little differently.
Part-whole-wheat loaf
Replace up to half of the all-purpose flour with whole-wheat flour and add a little extra milk if the dough feels unusually firm.
Extra-soft loaf
For an especially soft sandwich-style loaf, a tangzhong method can be used. This involves cooking a small portion of the flour and milk into a thick paste before incorporating it into the dough. The technique is commonly used to increase softness and help bread remain moist for longer.
This is better treated as a separate variation rather than something you need to add to the basic beginner recipe.
Storage and Reheating
Once completely cool, keep the bread tightly wrapped or in an airtight bread bag at room temperature.
For best texture, avoid refrigerating plain homemade bread unless there is a specific reason to do so; refrigeration can make bread stale more quickly.
For longer storage, slice the loaf and freeze the slices in a well-sealed freezer bag or container. This makes it easy to remove only what you need.
USDA guidance notes that bread quality is generally maintained in the freezer for about three months, although homemade bread can vary in quality depending on packaging and ingredients.
To reheat a slice
Toast it directly from frozen, or let it thaw briefly and warm it in a toaster oven.
Avoid repeatedly reheating the entire loaf, as this can dry it out.
Make-Ahead Instructions
You can prepare the dough through the first rise, shape it, place it in the loaf pan, cover it, and refrigerate it for a slower rise.
Because refrigeration slows yeast activity rather than stopping it completely, the dough should be monitored before baking.
For a simple first attempt, though, making and baking the loaf on the same day is easier because you can learn what properly risen dough looks and feels like.
Serving Suggestions
This bread works especially well for:
- Toast with butter and jam
- Breakfast sandwiches
- Peanut butter or other nut-butter sandwiches
- Grilled cheese
- Simple lunch sandwiches
- French toast
- Toasted slices alongside soup
For the softest slices, use a serrated bread knife and a gentle sawing motion rather than pressing down heavily.
Recipe FAQ
Why is my homemade bread not fluffy?
The most common causes are excess flour, insufficient gluten development, inactive yeast, or under-proofing. Check the dough’s texture and rise rather than relying only on the recipe’s timing.
Can I make this bread without a stand mixer?
Yes. A stand mixer is convenient but not necessary. The dough can be kneaded by hand until smooth and elastic.
How do I know when bread dough has risen enough?
Look for a noticeable increase in volume and a puffy appearance. During the final rise, a gentle finger press should leave an indentation that slowly springs back.
Why does my bread have a dense bottom?
A dense lower section can result from under-proofing, excessive flour, weak gluten development, or an unevenly mixed dough. Make sure the dough is properly kneaded and allowed enough time to rise.
Can I use active dry yeast instead of instant yeast?
Yes. The main difference is how the yeast is incorporated. Active dry yeast can be dissolved in lukewarm liquid first, while instant yeast can generally be mixed directly into the dry ingredients.
Why should I wait before slicing the bread?
Freshly baked bread is still setting internally. Cutting it while extremely hot can compress the crumb and give the center a gummy appearance.
Recipe Card
Soft, Fluffy Homemade Bread
Prep Time: 20 minutes
First Rise: 1–2 hours
Second Rise: 45–75 minutes
Cook Time: 30–35 minutes
Total Time: About 2 1/2–3 1/2 hours
Servings: 1 loaf, about 10–12 slices
Ingredients
- 3 cups (360 g) all-purpose flour
- 1 cup (240 ml) lukewarm milk
- 2 tablespoons (28 g) unsalted butter
- 2 tablespoons (25 g) granulated sugar
- 1 3/4 teaspoons instant yeast
- 1 1/4 teaspoons (7–8 g) salt
Instructions
- Warm the milk until lukewarm. Mix with the butter and sugar.
- Add the flour, yeast, and salt. Mix until a rough dough forms.
- Knead for about 7–10 minutes, until the dough is smooth, elastic, and soft.
- Place in a lightly greased bowl, cover, and let rise for 1–2 hours, until noticeably puffy and close to doubled.
- Gently deflate the dough and shape it into a smooth log.
- Place in a lightly greased 8 1/2 x 4 1/2-inch or 9 x 5-inch loaf pan.
- Cover and let rise for 45–75 minutes, until puffy and about 1 inch above the pan rim.
- Heat the oven to 350°F (175°C).
- Bake for 30–35 minutes, until golden brown and the center reaches about 190°F (88°C).
- Remove from the pan and cool on a rack before slicing.
Optional Notes
- Weigh the flour when possible for more consistent results.
- Do not add large amounts of flour simply because the dough feels sticky.
- If the top browns too quickly, loosely cover it with foil.
- A thermometer is the easiest way to check the center of the loaf.
Storage
Keep the completely cooled loaf tightly wrapped at room temperature. For longer storage, slice and freeze in a well-sealed freezer bag or container.
Source note: The technique and temperature guidance above were cross-checked against established bread-baking references, including King Arthur Baking’s sandwich-bread recipes and bread-making guidance, plus USDA storage guidance.